In this post, we’ll go through ALL the settings in the WordPress Customizer for your Storefront Theme. The options should be similar for other themes, but our examples use Storefront.
The WordPress customizer is very basic and simple. There are definitely more flexible and user-friendly page builders you can use to edit your page, but this is a quick and easy starting point.
Store Front Customizer Plugin
Customize your Storefront Theme
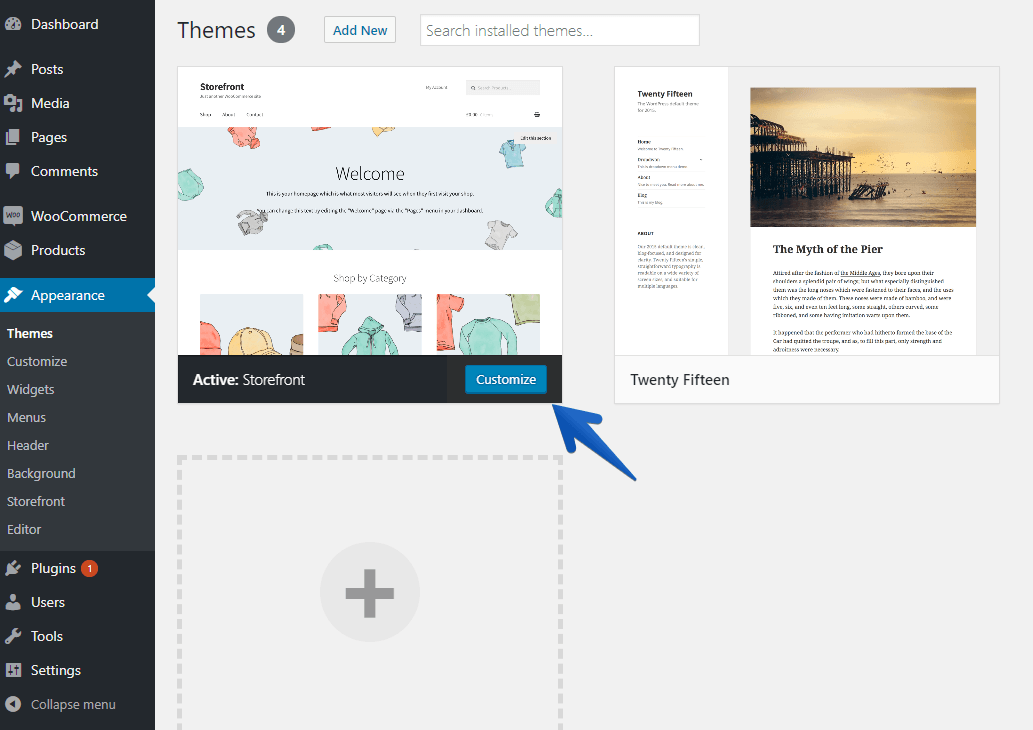
To access the default WordPress customizer, click Appearance in the WordPress sidebar.
You can click the Customize button on the active Storefront Theme as shown.
Or click Customize in the sidebar under appearance.
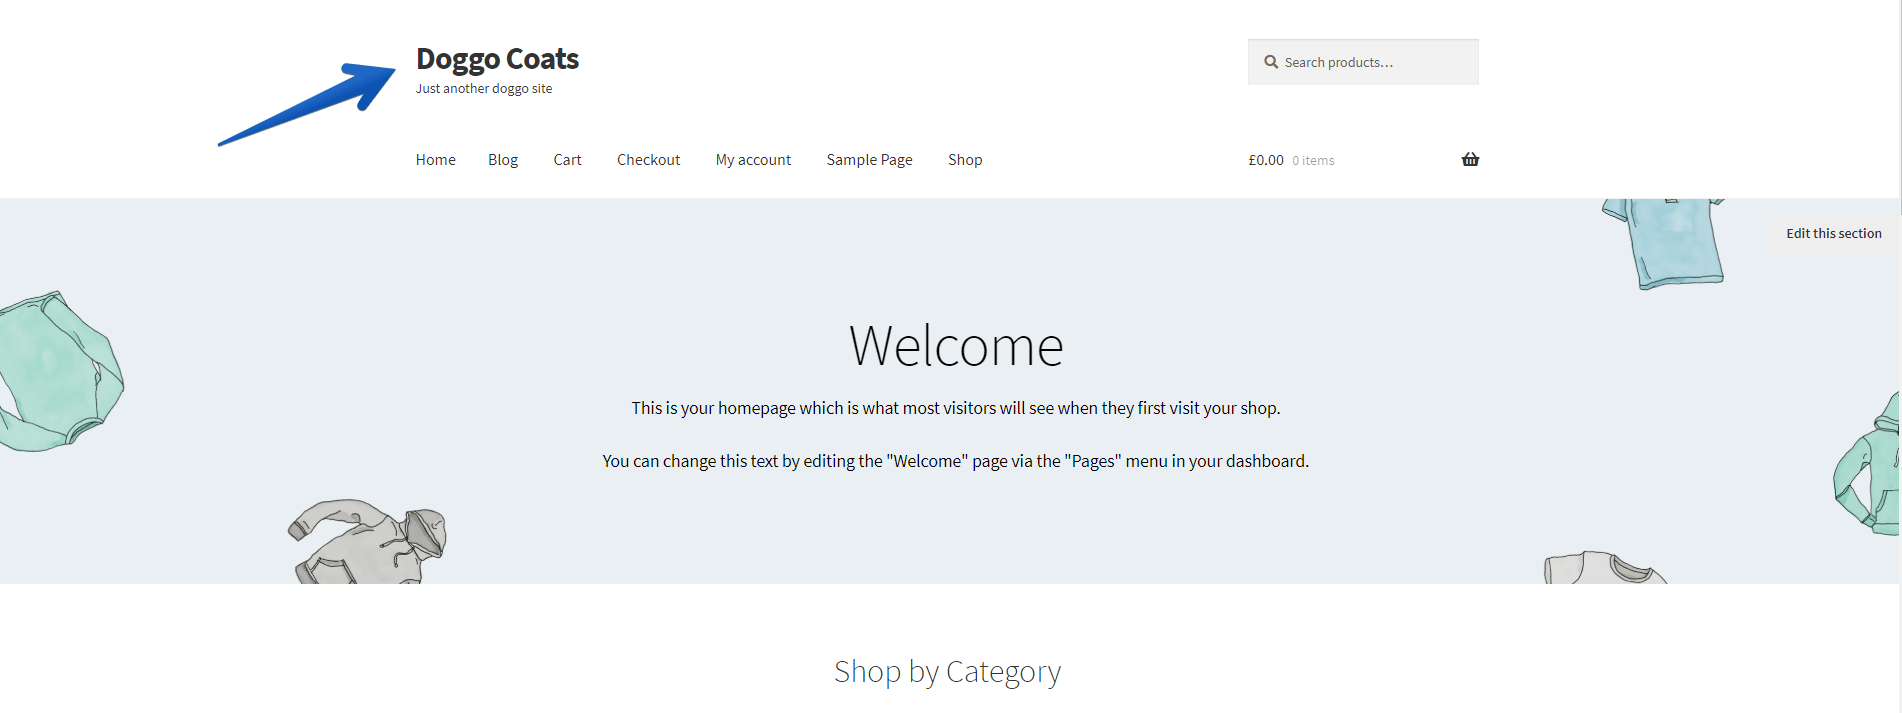
Either way, you’ll be taken to the WordPress Customizer page for your Storefront theme, which looks like this:
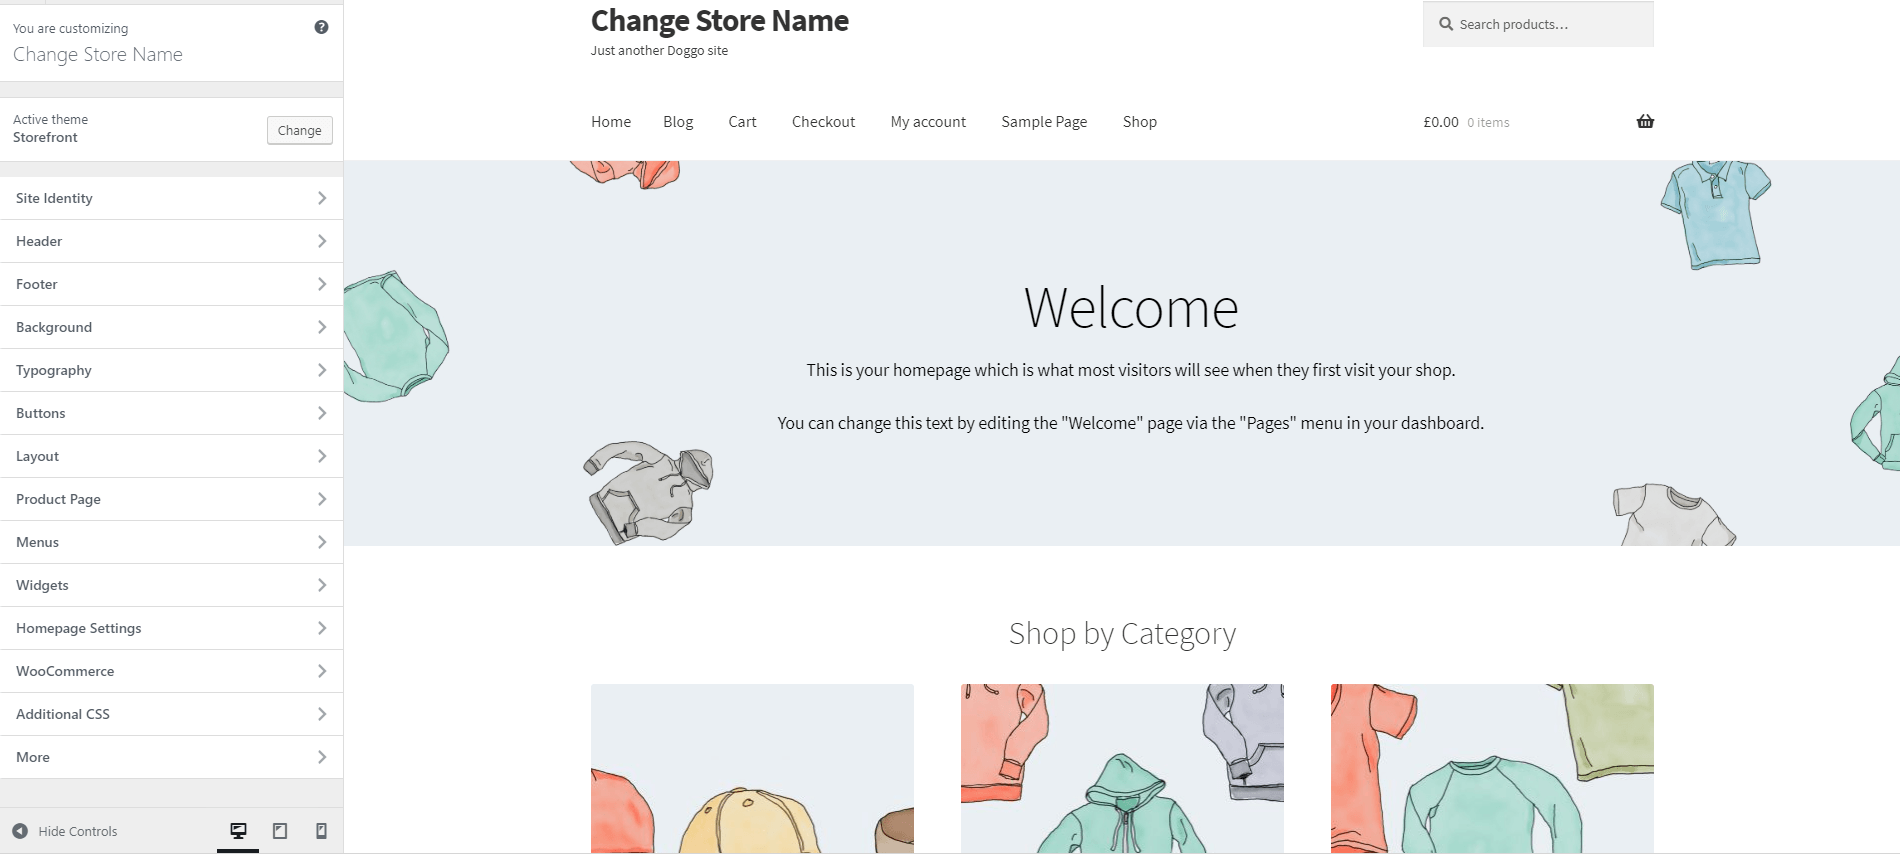
Now we get to the fun part where we look at each of the customizing options.
Remember to always hit the save or publish button after each change you make in the customizer if you want it saved!
Site Identity
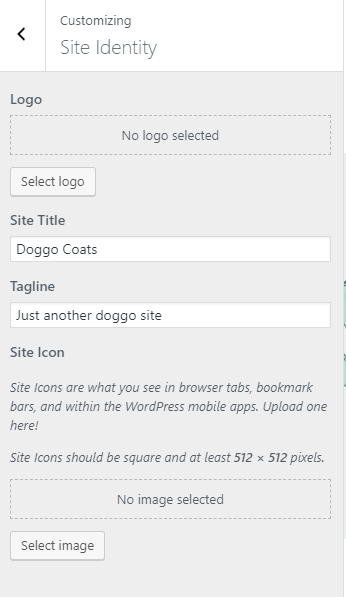
Clicking the Site Identity option allows you to:
- Add your logo – If you have a logo you want to appear at the top of your site pages, add it here. If you prefer to use text, use the following options instead.
- Add your site title – This will appear at the top of all your website pages. You can use this text instead of a logo.
- Add a tagline – the tagline will appear in smaller text below your site title.
- Add a Site Icon – the site icon is what appears at the top of tabs in browsers, or in bookmark bars.
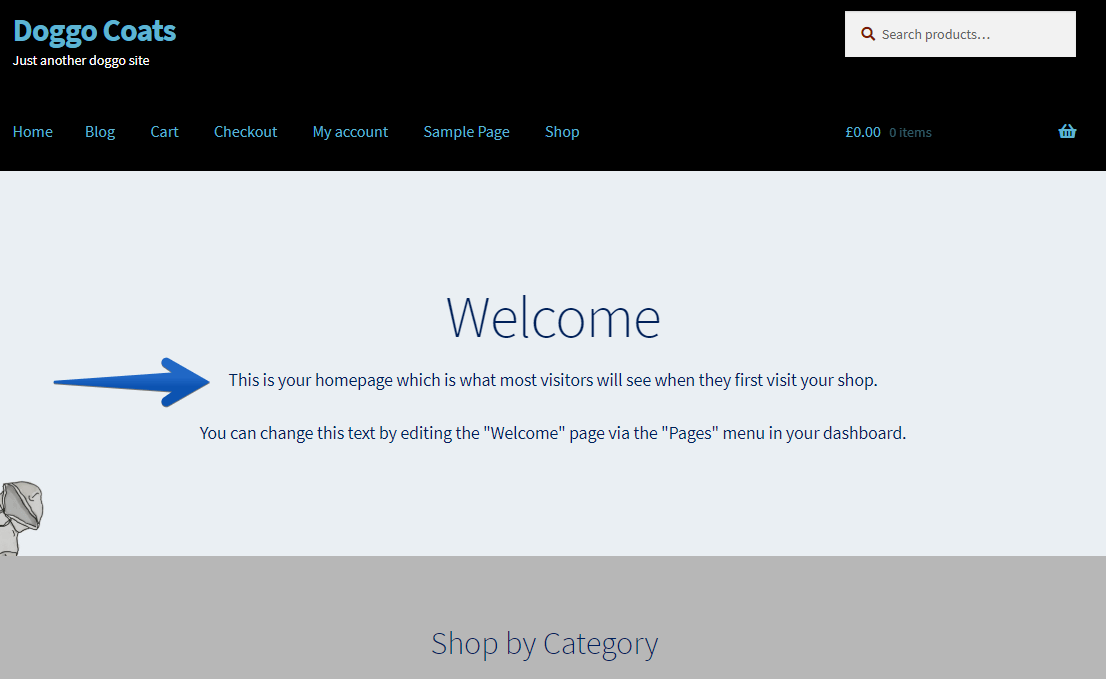
So currently, with no logo or title, your basic site will look like this:
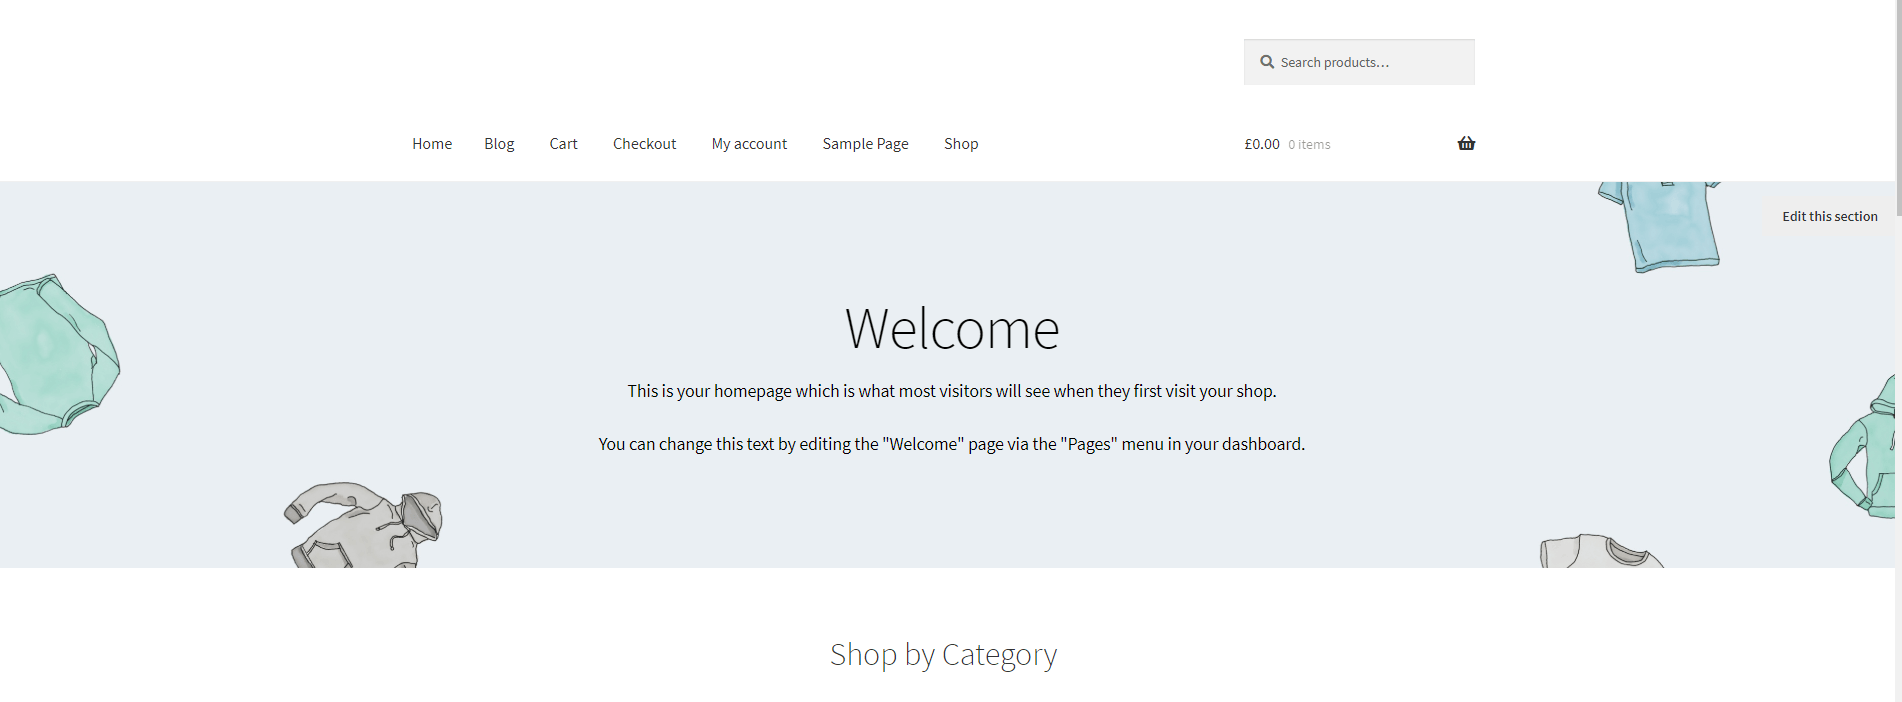
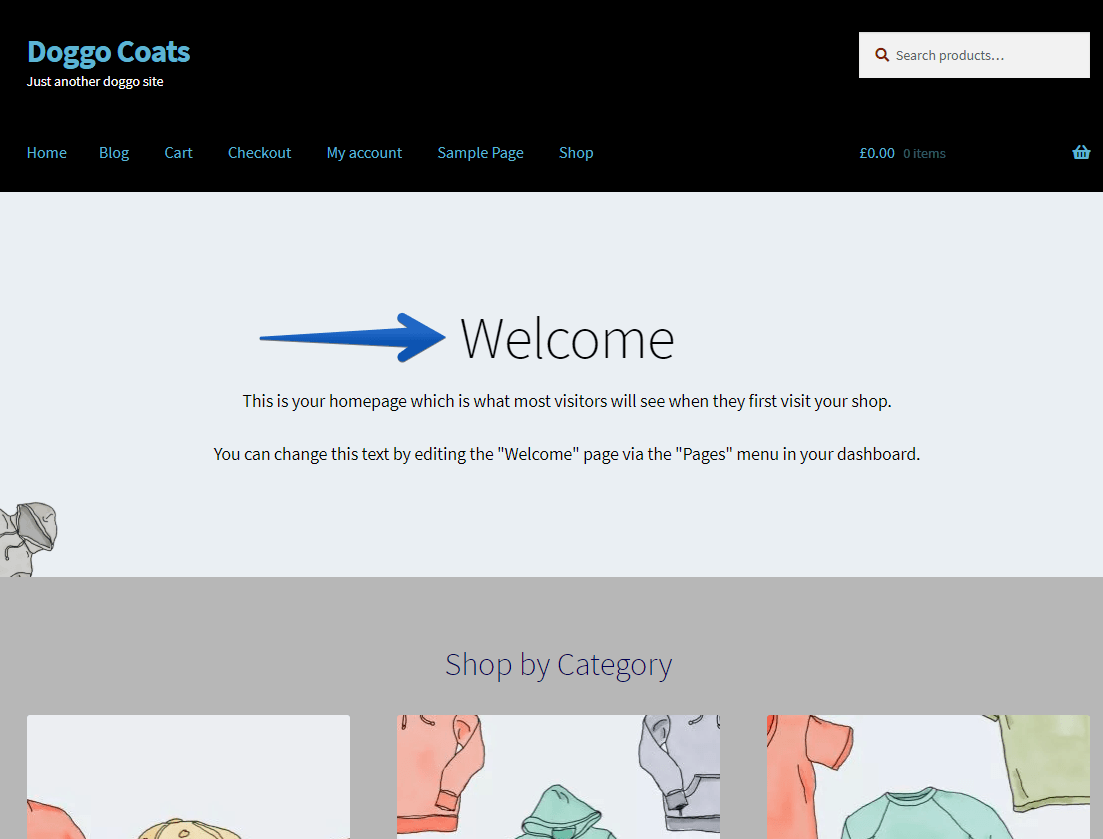
Now, if you write in a site title and tagline, the site will look like this:
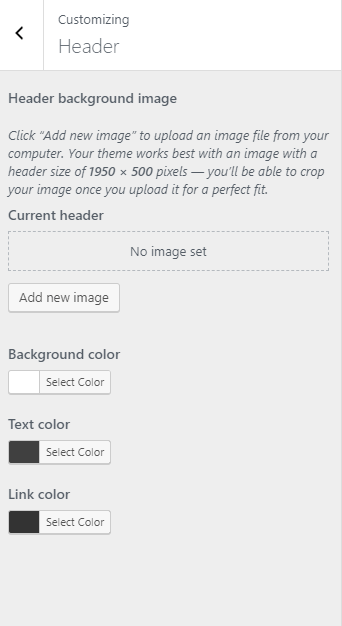
Header
The header is the section at the top of your site that includes your site title and menu.
Clicking Header gives you the following options:
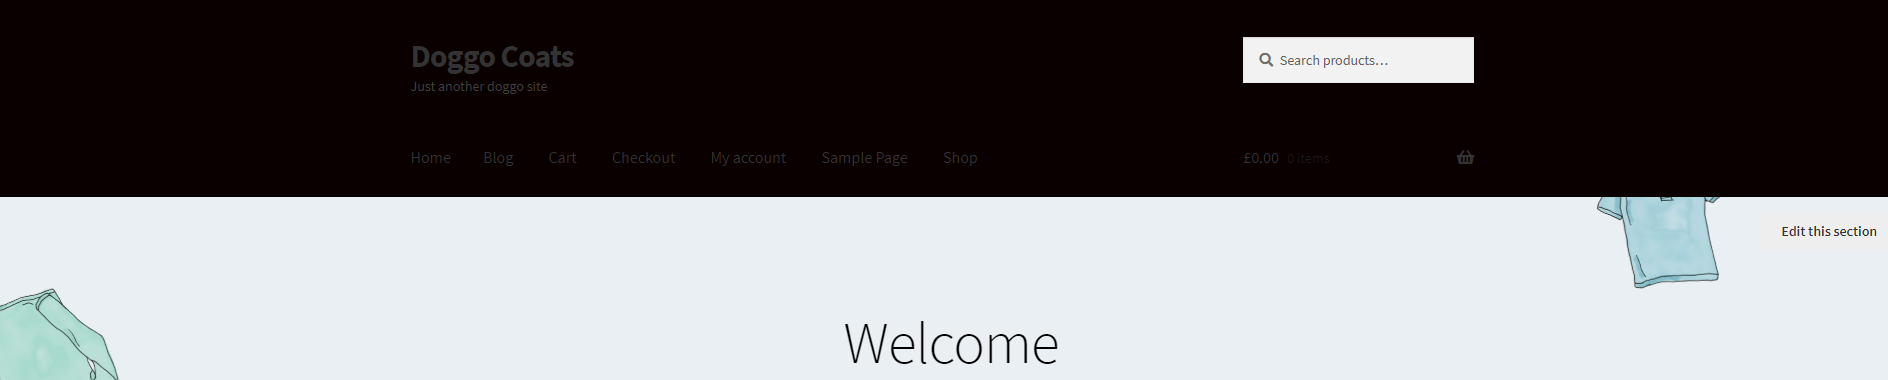
- Putting an image in the header – if you choose to upload an image, your header will change from this:

To this (but hopefully you select a better image to use).

- Selecting the background color of the header – you can do this instead of having an image, so your header background will look like this (we’re about to change the text color):
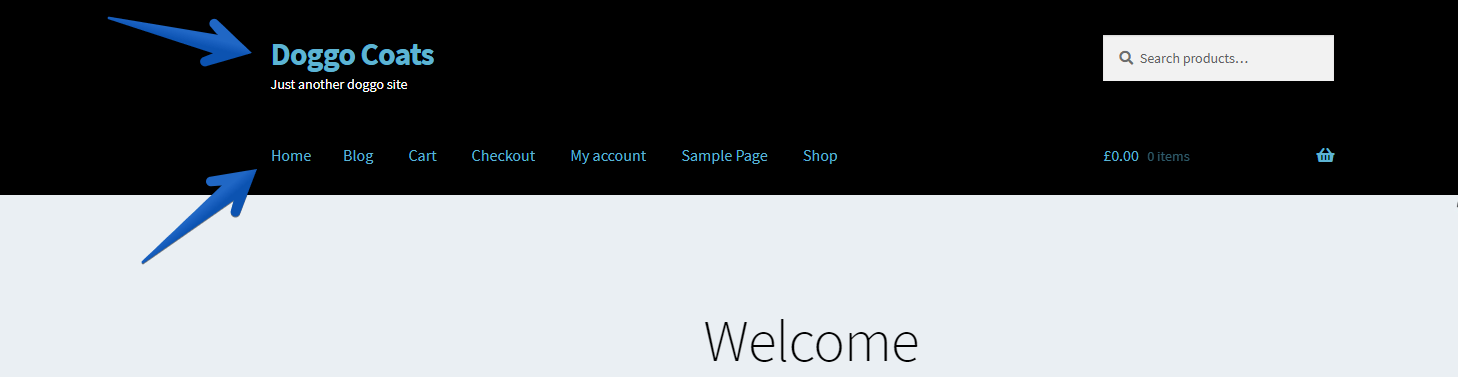
- Selecting the header Text color – changing the text color will change the color of your tagline

- Selecting the color of links in the header – Changing the color of the links will change the site title as well as the menu text.
Footer
The footer is the section at the bottom of your site that includes your copyright, contact details, opening hours, etc.
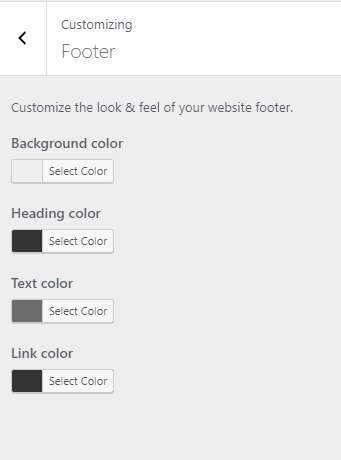
The options here are:
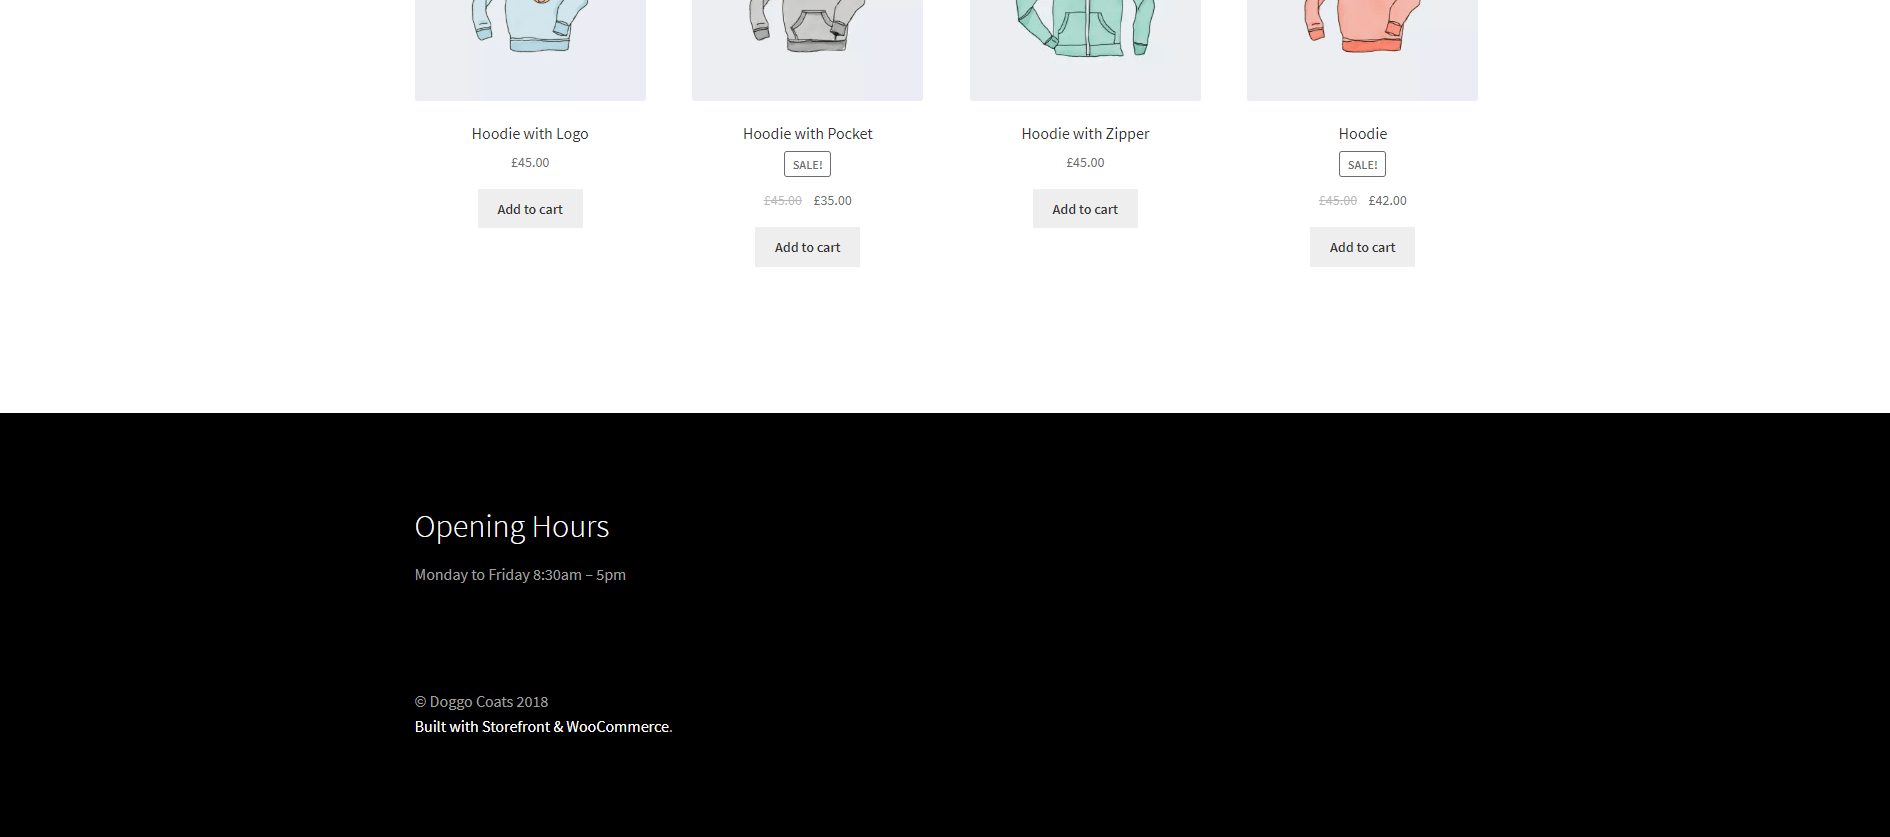
- Change the background color – Same thing as the header, we can change the background color of the footer. Here, we have changed it from gray to black.
- Heading color – This will change the color of any heading you have in widgets in your footer. This customizer is very simple and doesn’t give you many options for editing footers. So if you want to make a widget with extra content, you’ll have to exit the customizer and do it through WordPress. We’ve written a short post on how to do this here.
So, for an example, if you have a widget with your contact details as the heading, the heading will match the color you select under this option.

- Text color – changing the text color will change any paragraph text you have, like the descriptive text in your footer widgets and your copyright text.
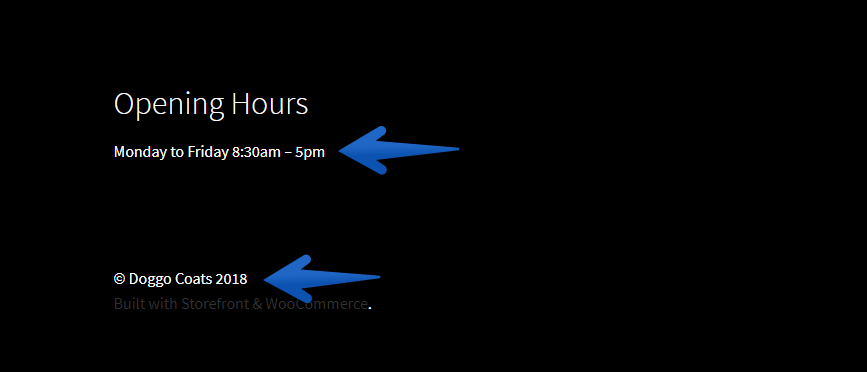
- Link color – changing the link color will change any links you have in your footer, which includes the Built with Storefront & WooCommerce text as well as any Menu links you have included in your footer.

If you want to remove that annoying Built with Storefront & WooCommerce at the bottom, there’s a good free plugin in the WordPress Repository for it.
We’ve also written a post on how to set up your own menus here.
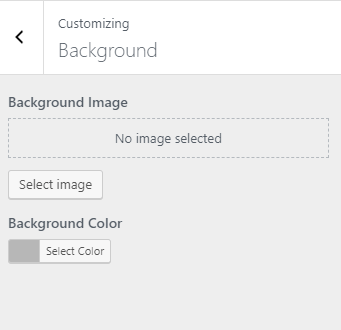
Background
The next option we have is background. Here, you can select an image or a color for your main site background.
Note that if you change the background color, it will apply to most of the page, but not the Welcome banner section that is part of the Storefront Theme.
Typography
Under typography, we have a few options to play with.
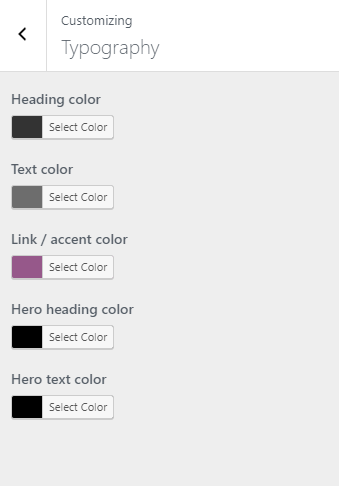
Changing the heading color will apply to all of your headings on your site at the heading 2 level as shown below.
A few things to note here. The color of the product titles will also change because they are tagged as heading 2 in the code for this theme also. It won’t apply to the big Welcome at the top of the page because that is a heading 1.
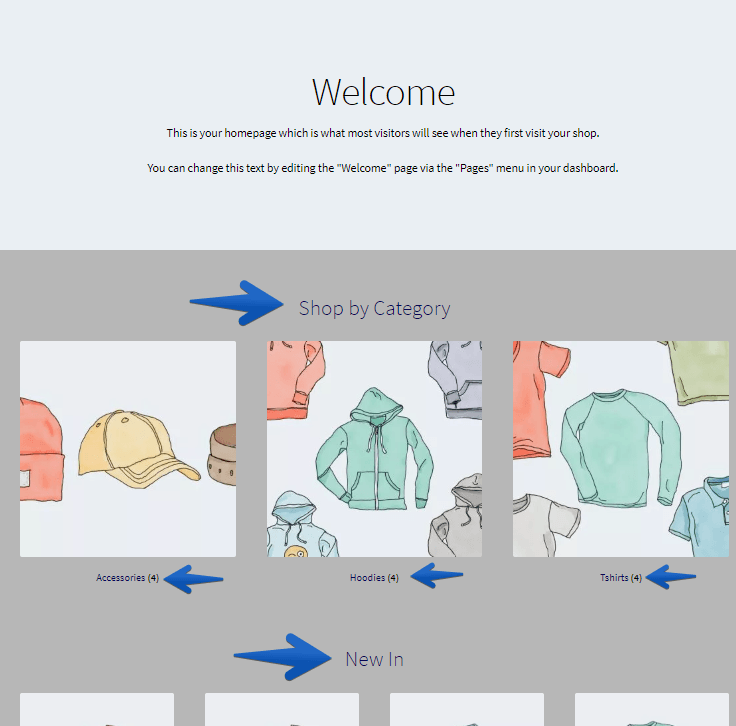
The text color and link/accent color didn’t make a whole lot of sense to me in this theme. It seems like some things that should be classed as links don’t get the link color, but others do. I’ve included a picture to demonstrate this below with the link color set to green and the text color set to red.
The hero heading color is what will change the main heading (the heading 1) on your site.
The hero text color changes the color of the text in the top section as shown below.
Buttons
Here, we can customize the buttons.
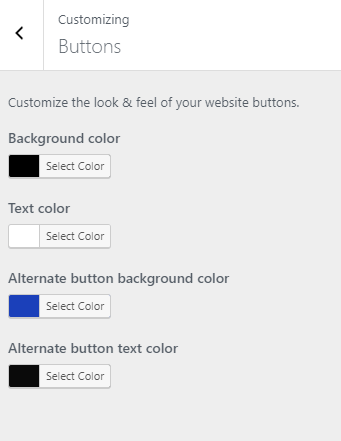
As you can see below, I’ve changed the background color of the main buttons to black with white text. I have then made the alternate button background color blue with black text.
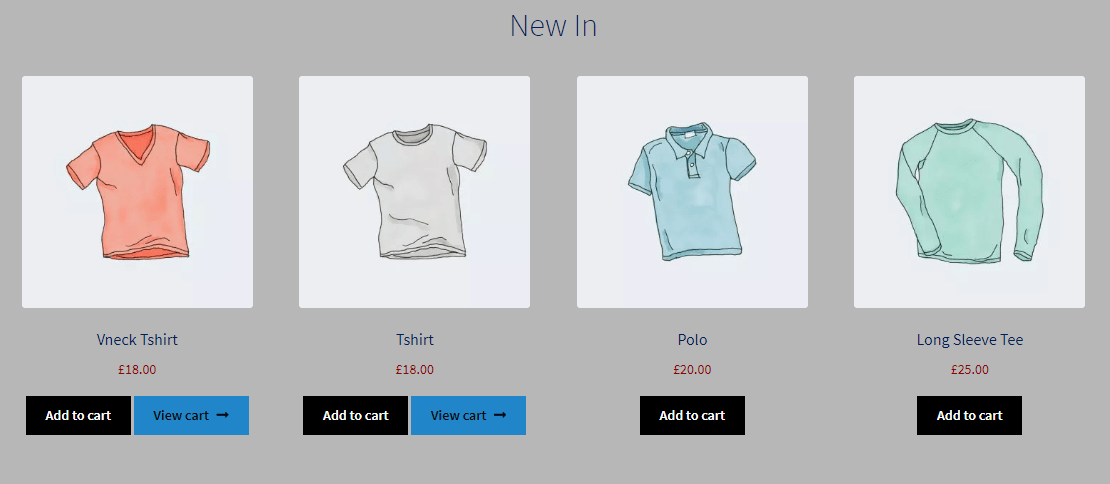
As you can see, the main buttons have a black background, but when I click add to cart, the alternate button comes up with the blue background and black text.
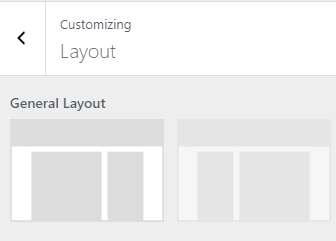
Layout
This section gives you very limited choices. Basically, in the Storefront theme you can choose which side of your page you want the sidebar to be displayed. There may be extra options here in other themes.
We don’t like the look of sidebars, so we’ve removed the items in it. We’ve written a post on how to customize or remove the sidebar here.
Product
There’s two options here, Sticky Add-To-Cart, and Product Pagination.
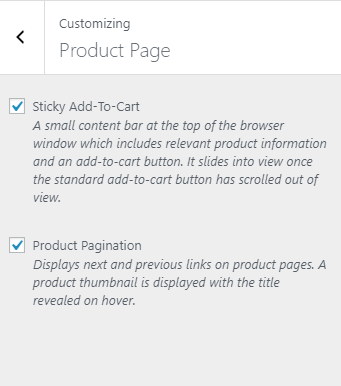
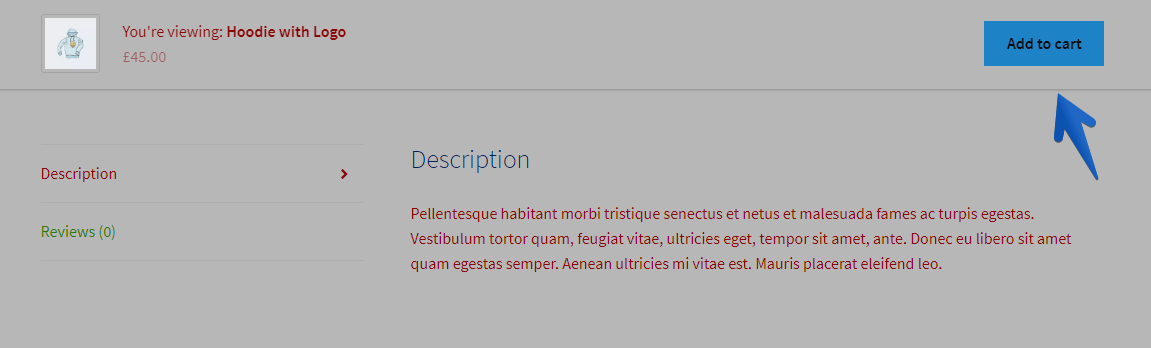
Selecting Sticky Add-To-Cart will give your customers a popup bar at the top of their page with the product and the add to cart option. This will only be displayed once customers scroll past the Add to Cart button.
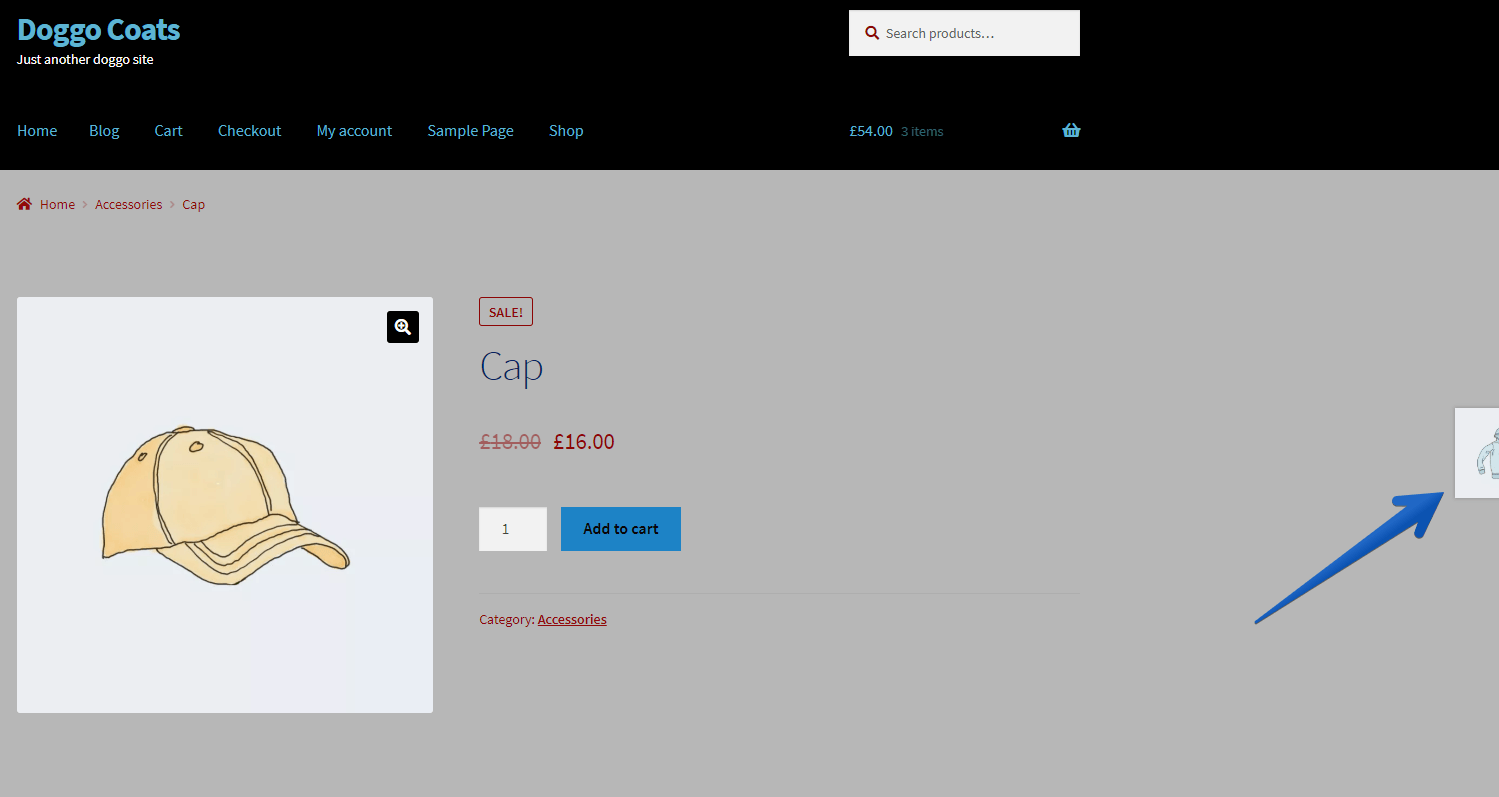
The Product Pagination option will put a little tab on the side that links to another product. The tab looks something like this
When customers hover over the icon, it will look something like this:
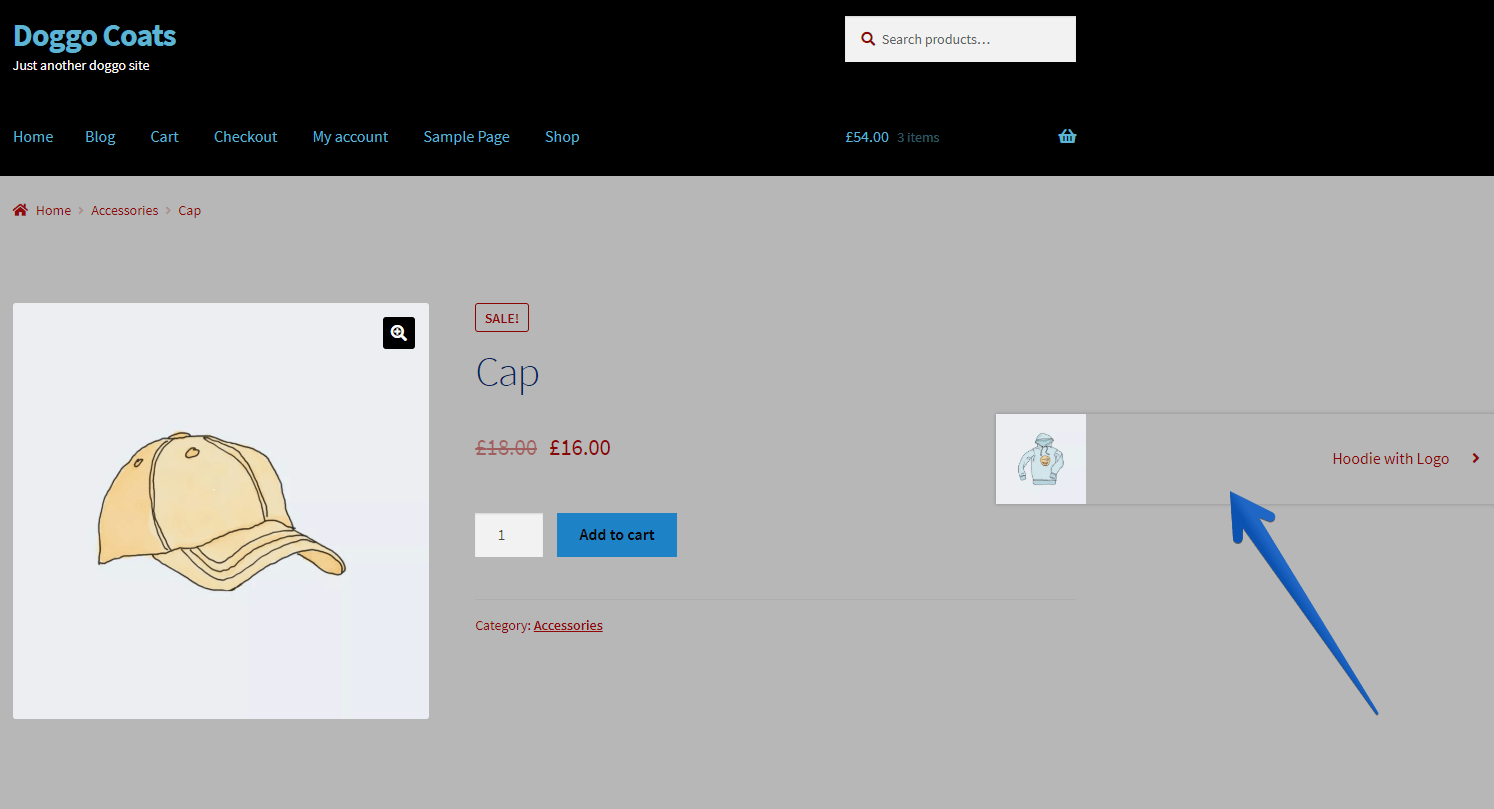
They can then click on that product and be taken to view that product.
Menus
Here, you can create your custom menus. We’ve also written a specific post on how to create menus, so click here if you prefer to use the WordPress Dashboard.
If you haven’t created a menu, the customizer should look like this.
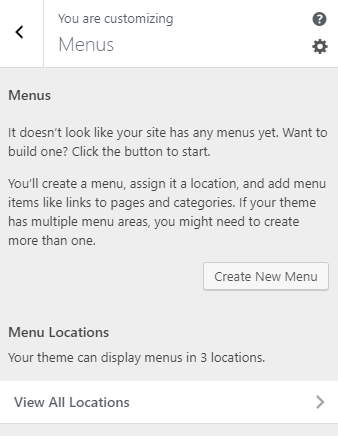
Click Create New Menu to get started.
Give your menu a name that will make sense to you when you’re adding it to pages on your site.
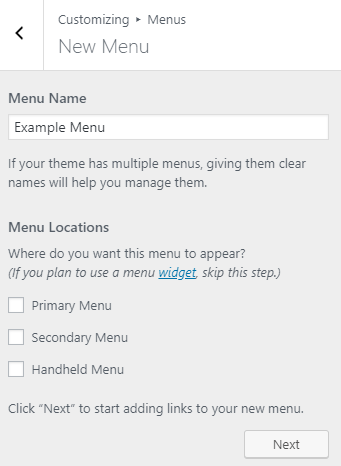
Primary Menu
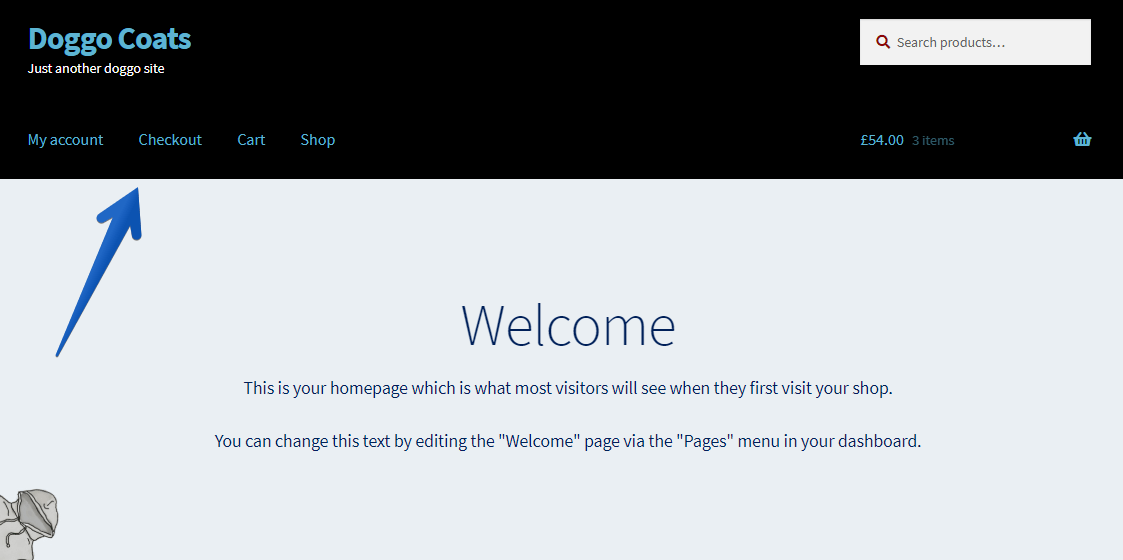
If you decide to make the menu a Primary Menu, it will appear in your header under your site logo or title.
Secondary Menu
If you select the Secondary Menu option, your menu will appear in the top right of the header.

Handheld Menu
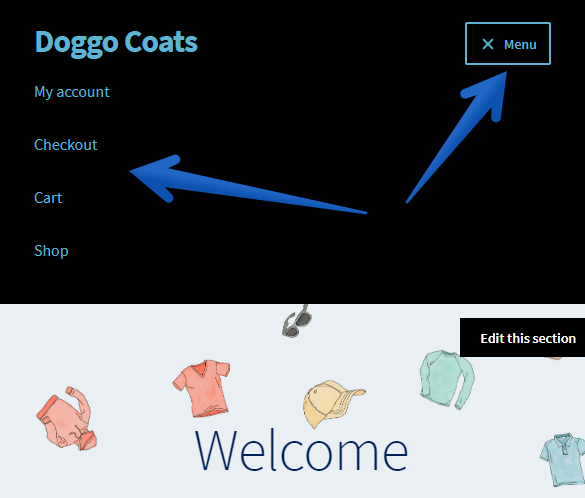
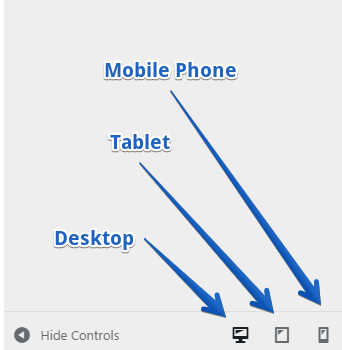
The Handheld Menu option is mainly for smaller screens like mobile phones or tablets, where you might want to display less options in the menu. It will look something like this:
You can always use the WordPress Customizer to check what your site looks like on a tablet or mobile phone by clicking the little buttons down the bottom.
Menu as a widget
If you’re going to use the menu as a widget (i.e. put it in the sidebar or footer), then don’t select any of the location options.
Then hit Next.
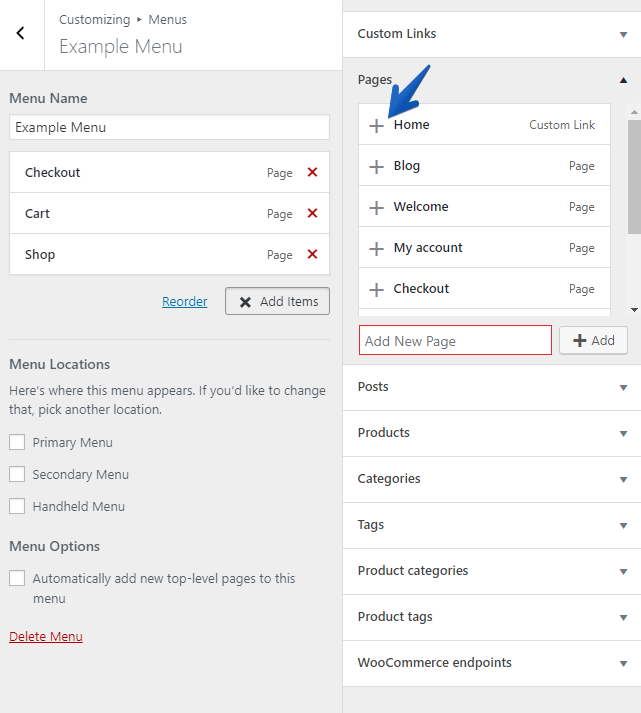
Add your menu items
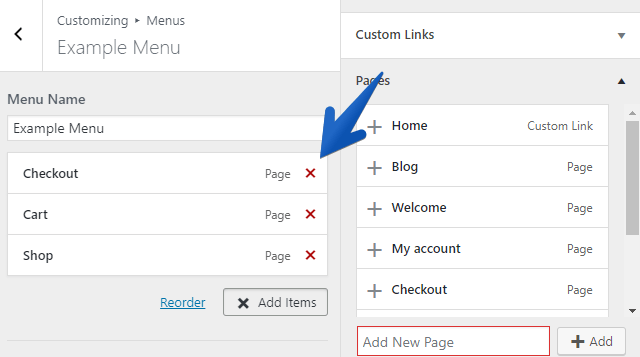
This is where you can add items to your menu. Just hit the Add Items button. Then, you can add your menu pages by hitting the little plus next to any pages you want to be in the menu. The items will then appear over under your menu. We’ve added Checkout, Cart, and Shop here.
You can also make menus with specific products, categories, or posts if you desire.
Delete items from your current menu by hitting the little red cross next to each item in your menu.
You can rename your menu navigation labels by clicking the little dropdown arrow next to each item and typing a different name into the navigation label.
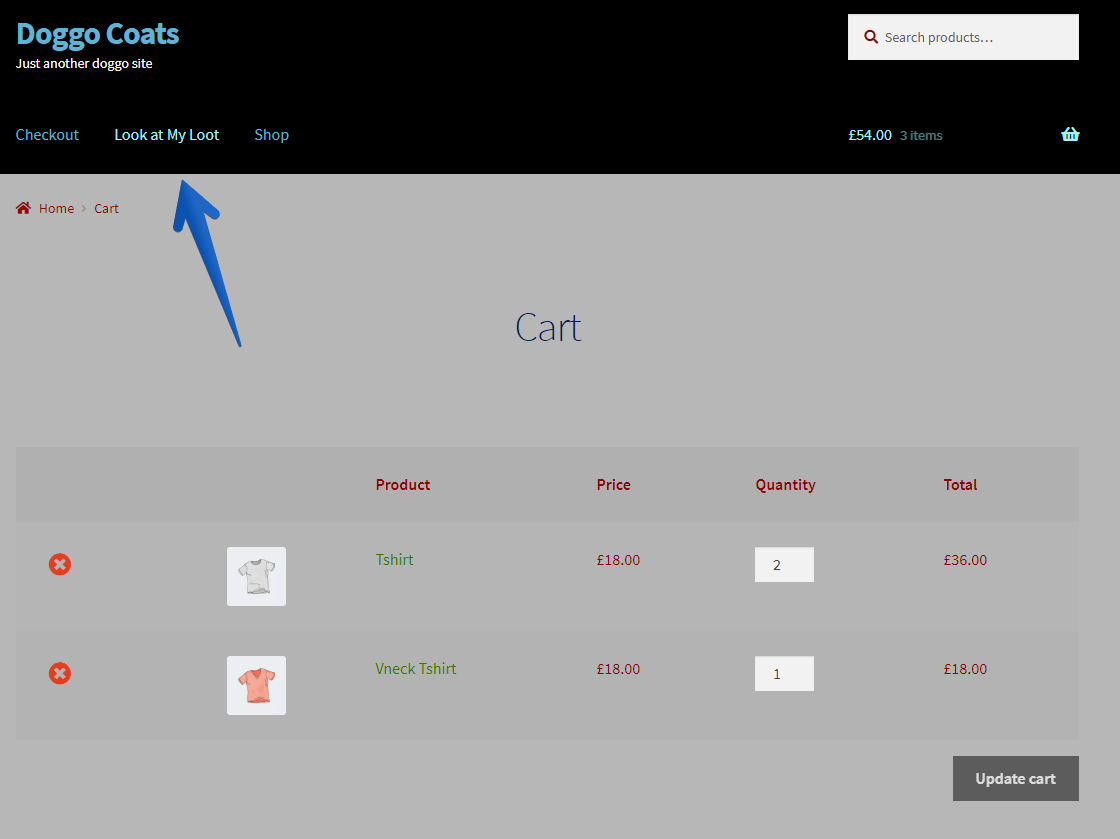
In this example, I’ve renamed the Cart menu item to Look at My Loot and set the menu to be my primary menu.
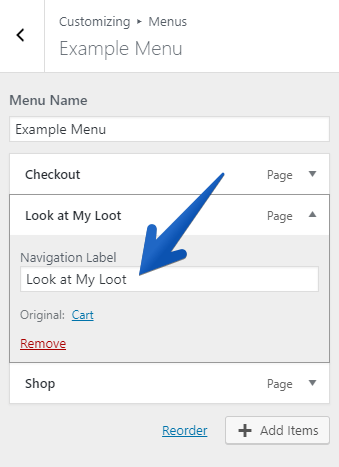
You can see in the customizer the original page title of Cart appearing below the navigation label.
Clicking on the Look at My Loot option still takes me to the cart, because it’s still linking to the cart.
If you want to Delete the entire menu and start again, there is a little red delete menu button at the bottom when you’ve got the menu open in the Customizer, it’s pretty easy to find.
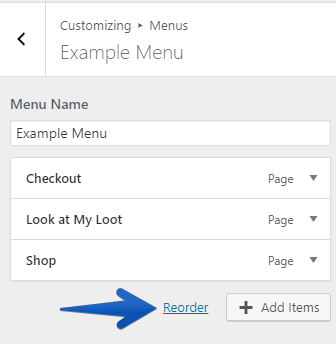
If you want to reorder your menu items, you can either click reorder and use the little arrows, or you can simply drag and drop items where you want them to be in the menu.
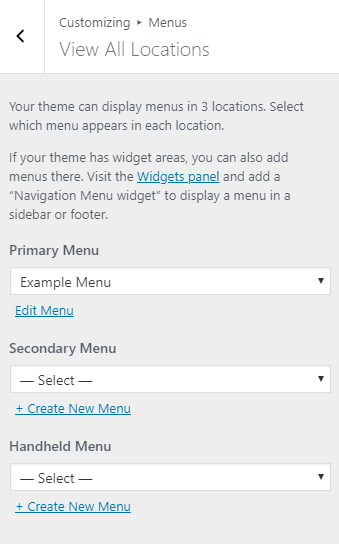
The Menu Locations option lets you select different menus for the three different menu locations that I’ve explained above.
Widgets
The Widgets option lets you add items to your sidebar, below the header, or in the footer. This can be useful for adding items such as contact details, opening hours, side menus, etc.
We’ve written specific posts on how to customize the sidebar and also how to customize the footer through the WordPress Dashboard and have gone into a bit more detail about how to add and edit the widgets there.
Take a look at those posts if you want to know more about adding widgets to your site.
Homepage Settings
This is where you set which page you want to be your store’s homepage.
Your first option is to decide whether you want your homepage to display your latest posts (mainly for blogs), or to display a static page.
For an online store, we’ll select the static page option.
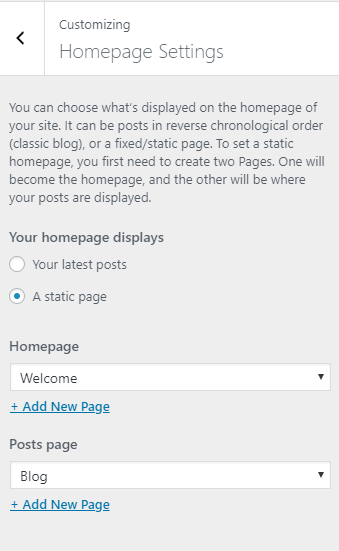
You can use the dropdown to select one of the default pages created by the Storefront theme (if you’re using that one). Or you can make your own page by clicking the blue Add New Page button.
Note that if you want to edit the content on any of your pages, you will need to access the page using the Pages tab in the WordPress Dashboard. Alternatively, you can install a page builder. We recommend Elementor, which has a good free version. But definitely look around for one that works for you.

You can also select which page your posts will appear on, which is mainly useful if you have a blog on your store. Don’t worry, your products won’t appear here (even though they’re technically considered a type of post). This setting is strictly for blog posts
WooCommerce
These section gives you access to some WooCommerce specific settings.
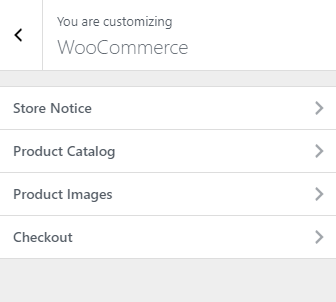
Store Notice
This settings lets you put a banner notice on the bottom of your site. This is good for showing events, sales, promotions, or store notices (like if you’re going on holidays soon).
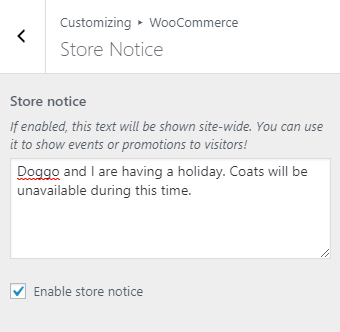
All you have to do is write your text and click the Enable store notice button.
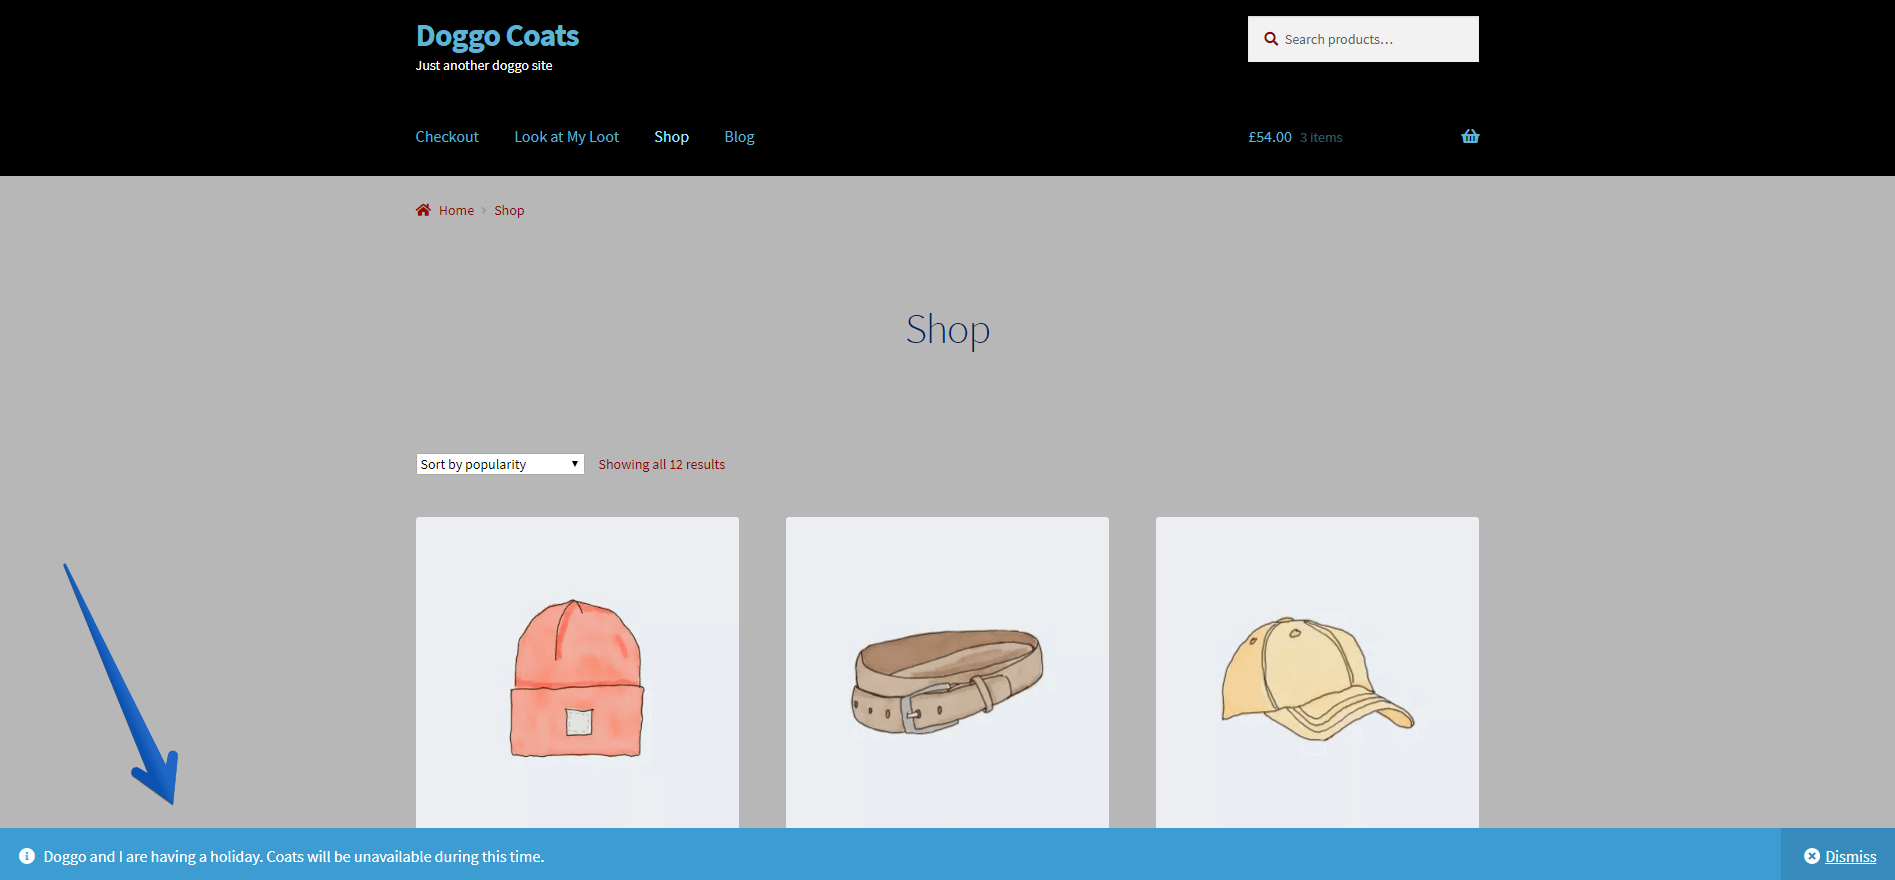
The banner will then appear on all pages of your site.
Product Catalog
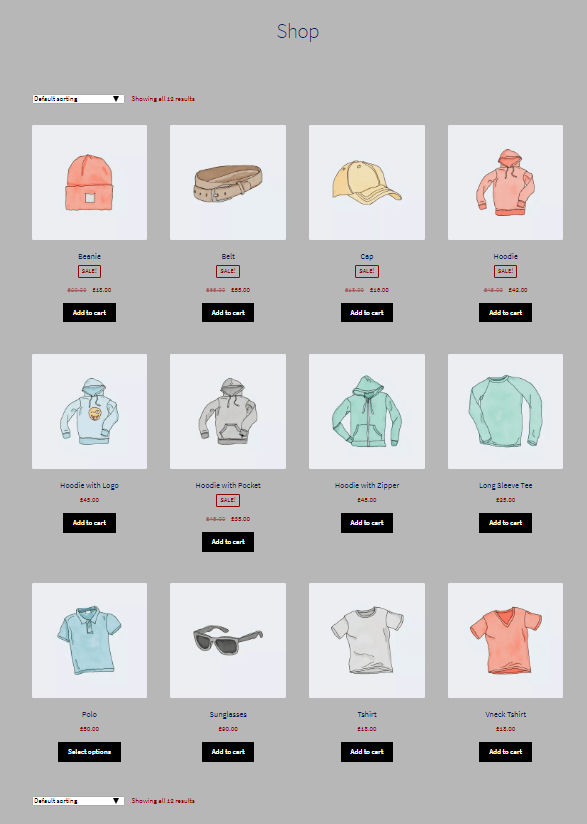
Here, we can decide how the Shop page will look. Remember, this is not our site’s home page, but it is the catalog where people can go to view all our products.
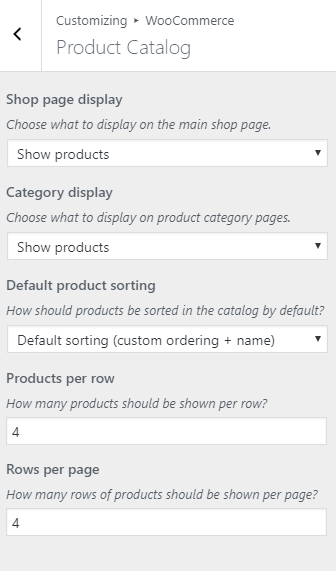
Shop Display
The shop page display option lets us select from a dropdown menu what we want to display on the main shop page.
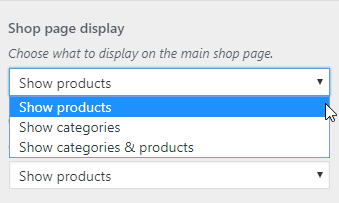
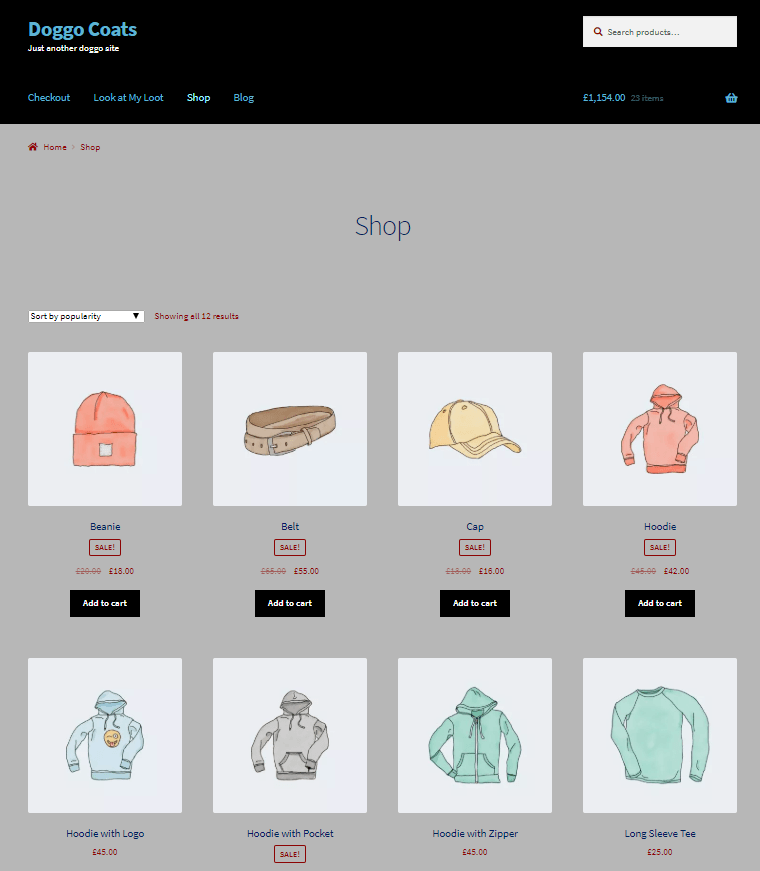
We can choose show products, which will display all our products on the shop page.
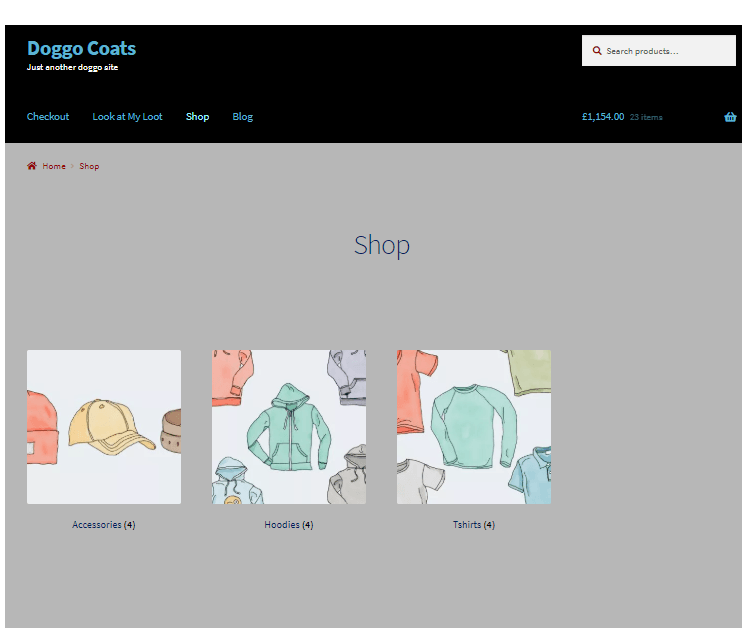
We can select show categories, which means only the product categories will be shown on our shop page. This would be ideal if you have a lot of products and want an easy way for customers to browse products within certain categories.
Or, we can select show categories and products, which puts the categories first and all the products after.
Note that the product list will continue directly after the category list, rather than on a separate line. As shown below, my list of products starts on the same row as my list of categories.
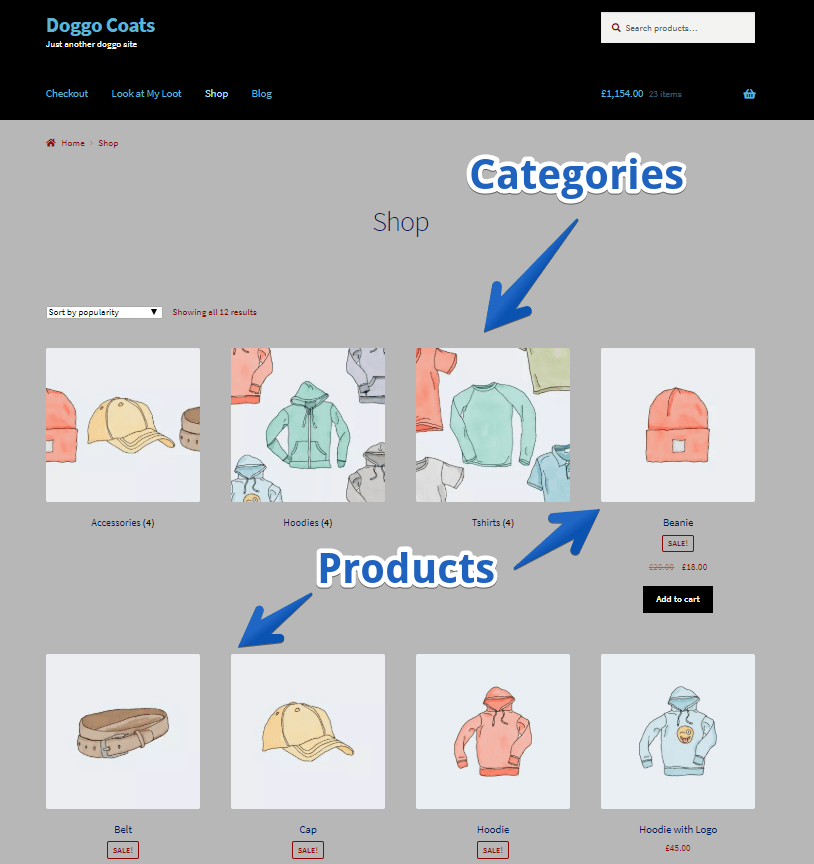
The way to get around this is to change the number of items you show in each row, which we’ll cover soon.
Category Display
This option lets us decide what customers will see when they click on a product category.
These settings will only apply when customers open a product category page.
Show products will display all the products in that category.
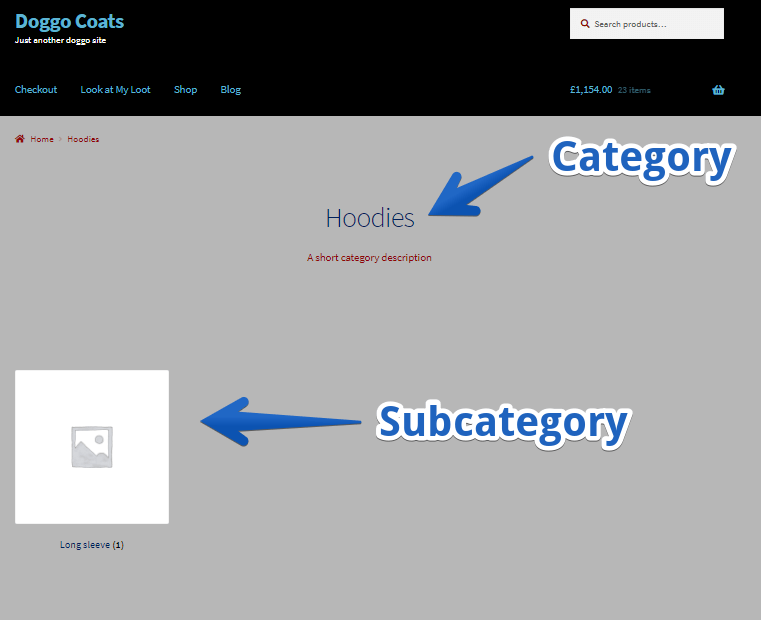
Show subcategories will display only any subcategories we have in that section. For example, I’ve created a long sleeve category under hoodies.
One thing to remember is that you want to make it easy for your customers to view your products. So it might not be ideal to make them click through a bunch of categories and subcategories.
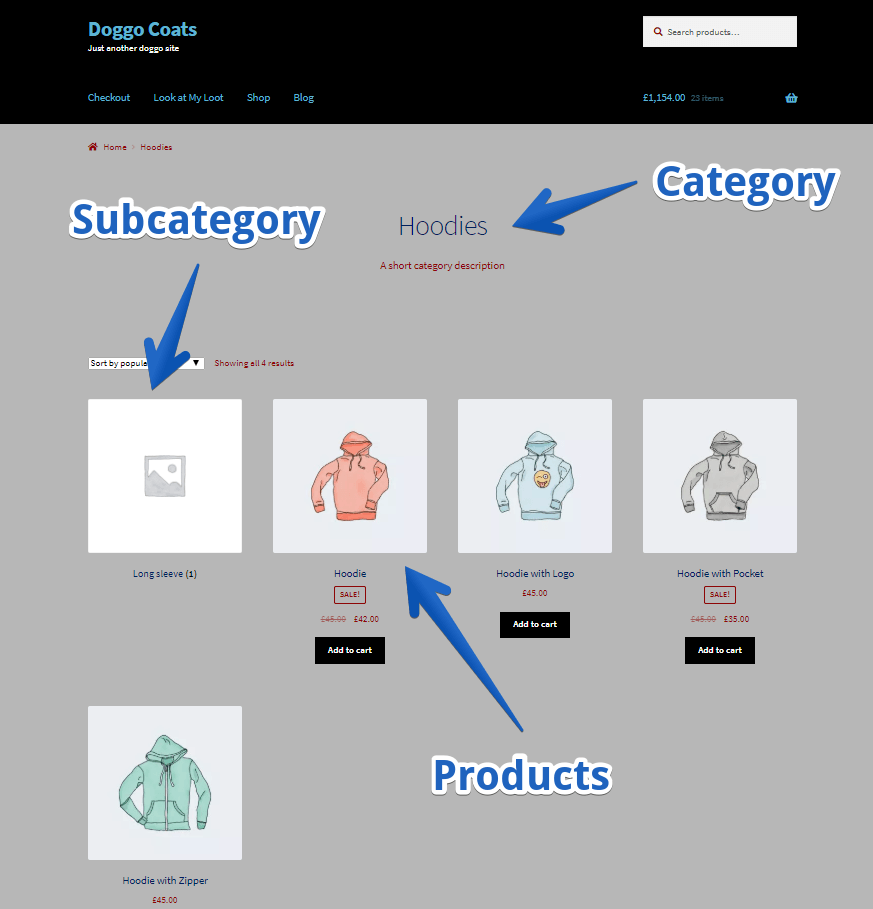
We can also choose to show subcategories and products, which then gives customers both options to look at.
Hopefully you’ll make yours look a little cleaner than this.
Product Sorting
Next, we can decide on the order our products will be displayed on our Shop page. There are six options here.
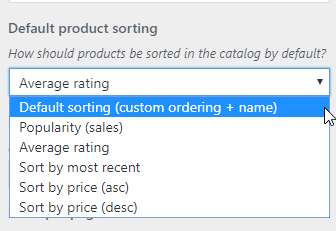
- Default sorting (custom ordering + name) – this setting will display products alphabetically by default. If you’ve gone into the advanced settings of the individual product itself and given it a custom menu position, then this will take priority and be placed first. For more information on product settings, see our post on how to add products to your WooCommerce Store. ‘
- Popularity (sales) – This setting will show your products based on the amount you have sold. So if you’ve sold 50 hats and 20 jumpers, hats will show before jumpers on your shop page.
- Average rating – Sorts your products based on customer reviews. We haven’t tested this one.
- Sort by most recent – Shows the products you’ve listed on your site most recently first and the oldest products last.
- Price (asc) – shows the cheapest products first and the most expensive at the end.
- Price (desc) – shows the most expensive products first and the cheapest last.
Products Per Row
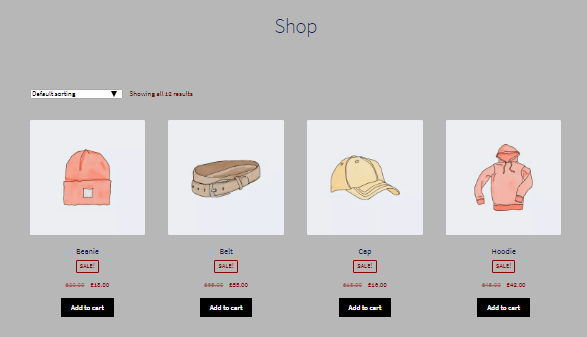
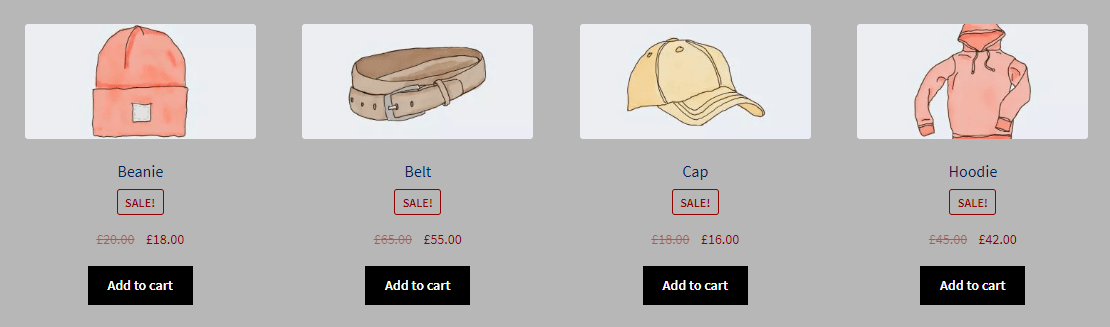
This setting lets you choose how many products you want to display in each row across the page. The most you can display is six. I’ve selected four, so a row of products on my shop page would look like this:
Rows Per Page
This lets you select how many rows you want to show on each page.
Customers don’t want to have to wait for ages to have to view your shop because it’s trying to load a billion product images all at once, but they also don’t want to have to keep clicking through pages because they can only see a few products on each page.
So you might need to experiment to find the balance where your shop page displays a good amount of products while still keeping your page loading quickly.
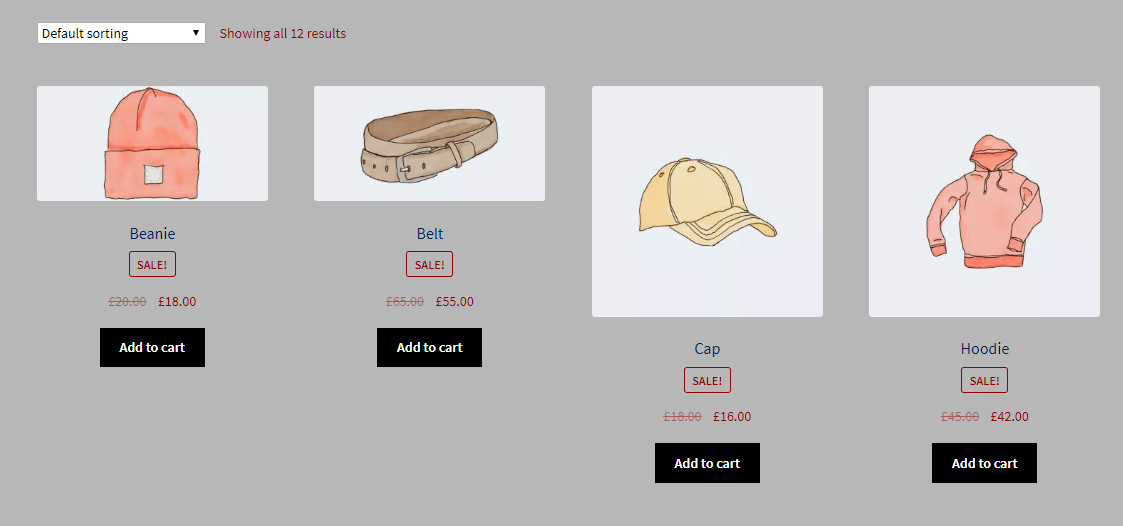
I’ve selected three, which means customers will see 12 products per page (each row has 4 products and I have 3 rows per page: 4×3 = 12).
Product Image Size
Here, you can choose how products appear on your store pages.
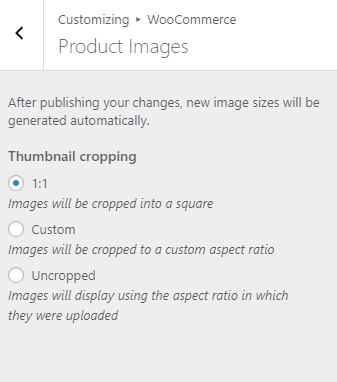
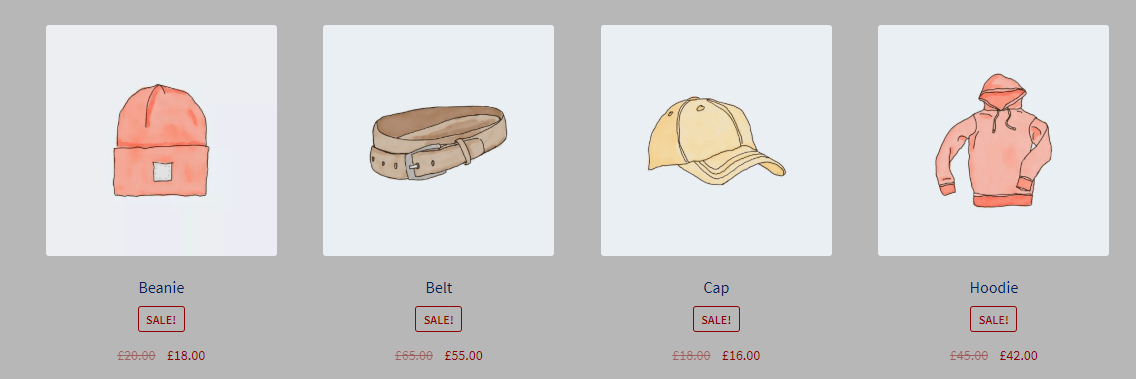
The first option 1:1 will crop all your images into nice clean squares.
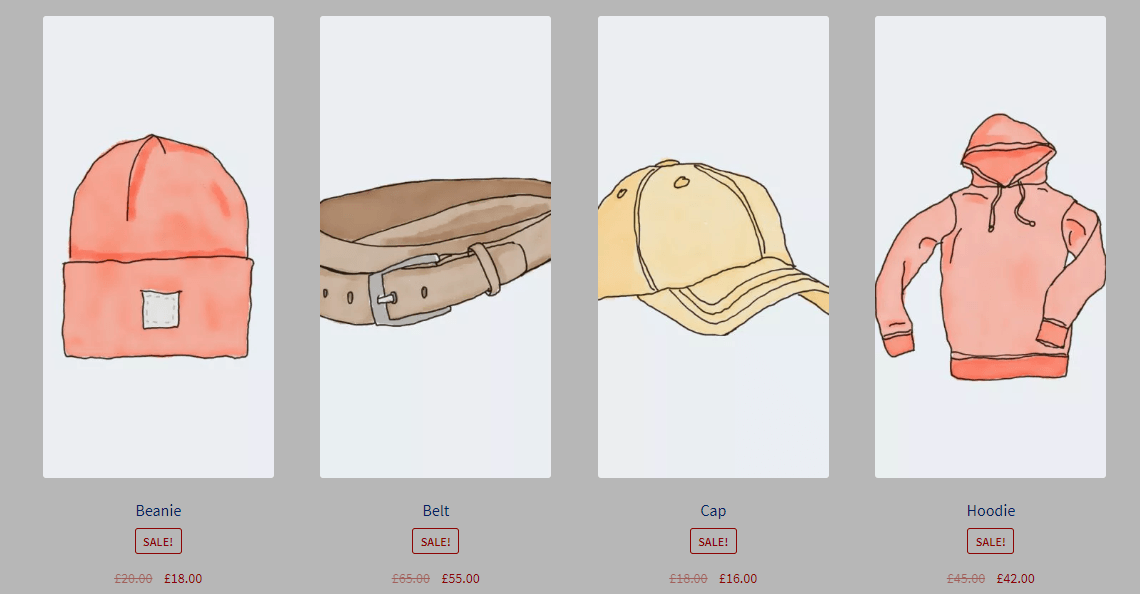
Or you can set a custom ratio, For example, 1:2 gives you rectangles this way:
While a ratio of 2:1 gives you cute little rectangles this way:
Or, you can just choose the uncropped option, which will display your images in the same ratio that they were uploaded. Keep in mind that if you’re uploading different sized images, it might look a little messy on your shop page if you select this option, like so:
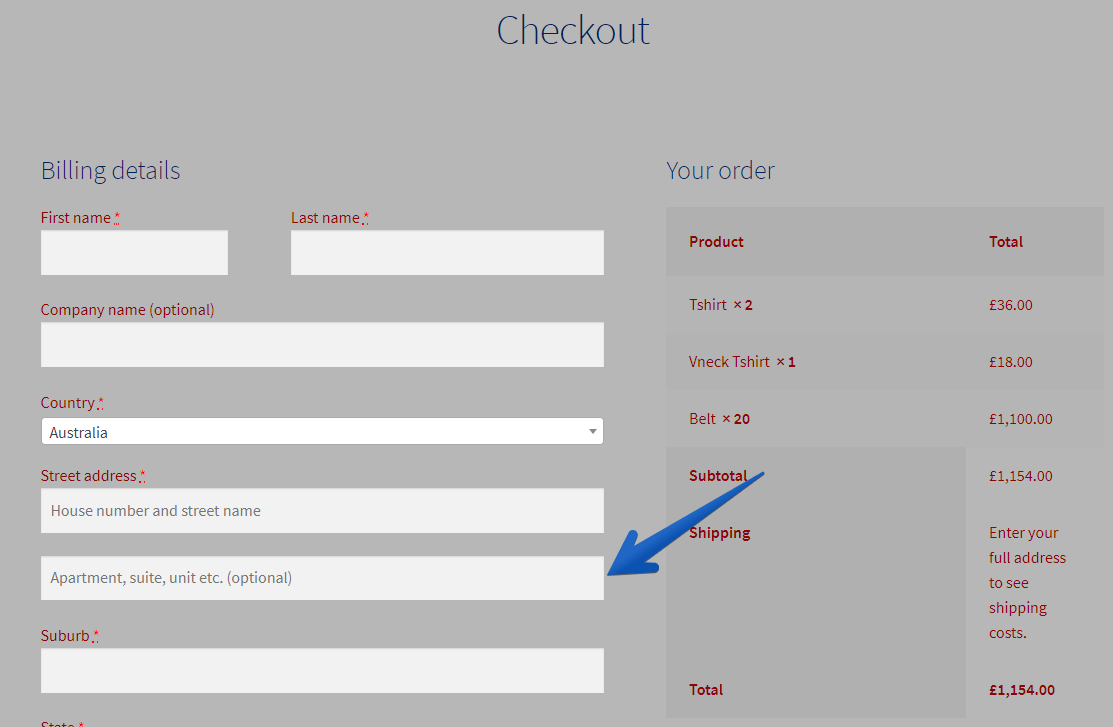
Checkout
As you can probably imagine, this page is for customizing your checkout page.
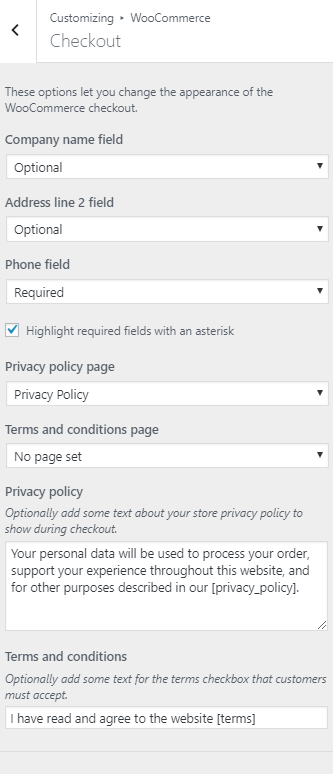
Company name field
You can choose whether to have a company name field for customers and whether to make that an optional or a required field. You’d only have it as required if your store accepts orders from companies only and not individuals.
Address line 2 field
You can select if you want to give customers an extra address line, which might be good for people in apartments. You can also make it optional or required.
Customers are required to put in an address anyway, so you’d generally make the address line 2 optional.
Phone Field
Again, you can choose to give customers the option to add their phone number – the more details you can get, the better, right?
You can choose to make this optional or required also.
You can also select whether you want required fields to be highlighted with an asterisk, which is probably a good thing. You don’t want customers to have to go back and fill in details that they didn’t know were required.
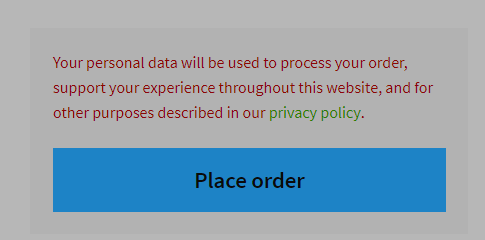
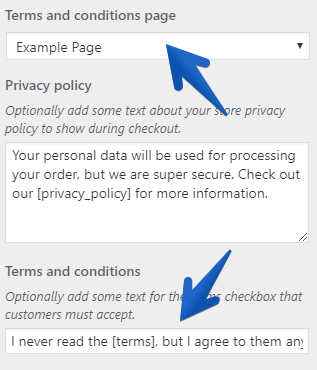
Privacy Policy
Here, you can select if you want to display a privacy policy link above your place order button. Look at your local rules as to whether you’re required to do this or not.
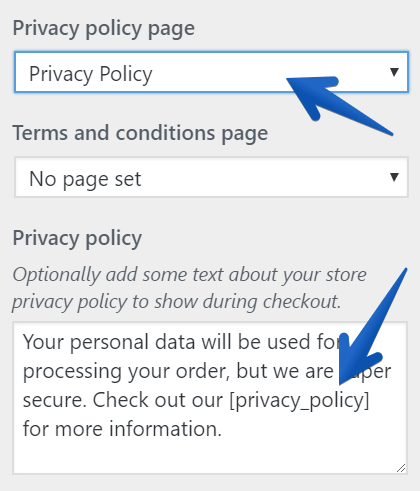
You can select your Privacy Policy page from the dropdown and it will add a descriptive box on your checkout page.
There is an option a little further down where you can edit the text to go along with it. Just make sure you leave the [privacy_policy] as it is because it is the link to your privacy policy page.
Terms and Conditions
If you want to cover yourself in case of anything going wrong (that isn’t your fault of course), you’ll need your customers to agree to the terms and conditions.
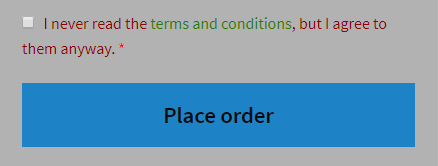
Again, you can select your page for the terms and conditions. There isn’t one here by default, so you’ll need to make your own by going to your WordPress Dashboard, Pages, Add New.
Then you can write your text to go with your terms and conditions link, but again, leave the [terms] as it is, because that’s your link for customers to click to actually read the terms and conditions.
Additional CSS
If you know how to write CSS, you can add it here to use your own styling. We won’t go into that, because we’re assuming if you know how to do this, then you wouldn’t be using the WordPress Customizer – a child theme would be the way to go!